A bathroom without proper ventilation is a bathroom on borrowed time. Mold creeps into grout lines, paint peels from ceilings, mirrors fog endlessly, and moisture quietly damages your home’s structural integrity. The solution is straightforward — but only if you get it right. Knowing how to choose a bathroom exhaust fan that matches your space, your lifestyle, and your budget is the single most important decision you’ll make for your bathroom’s long-term health.
This guide walks you through every factor that matters — from airflow calculations and noise ratings to must-have features and replacement scenarios — so you can confidently select a fan that performs flawlessly for years.
Why Your Bathroom Exhaust Fan Matters More Than You Think
Bathrooms generate an extraordinary amount of moisture. A single hot shower can release half a pint of water into the air. Without adequate ventilation, that moisture settles into walls, ceilings, cabinetry, and flooring. The consequences include:
- Mold and mildew growth, which poses serious health risks including respiratory problems and allergic reactions.
- Structural damage to drywall, wood framing, and subflooring.
- Peeling paint and wallpaper, leading to costly cosmetic repairs.
- Persistent odors that linger long after the bathroom is used.
A good exhaust fan doesn’t just clear steam from your mirror. It actively protects your home. That’s why learning how to choose a bathroom exhaust fan correctly is essential — not optional.
Step 1: Understand CFM and Size Your Fan Correctly
CFM — cubic feet per minute — measures how much air a fan moves. It’s the single most critical specification when selecting a bathroom exhaust fan, and getting it wrong renders even the most expensive unit ineffective.
How to Calculate CFM for Your Bathroom
The Home Ventilating Institute (HVI) and most building codes recommend a simple formula:
For bathrooms up to 100 square feet:
Use a rate of 1 CFM per square foot of floor space. A 75-square-foot bathroom needs a minimum of 75 CFM.
For bathrooms larger than 100 square feet:
Calculate based on the number of fixtures. Assign CFM values as follows:
| Fixture | CFM Required |
| Toilet | 50 CFM |
| Shower | 50 CFM |
| Bathtub | 50 CFM |
| Jetted tub | 100 CFM |
A large master bathroom with a separate shower, soaking tub, and toilet area would need a minimum of 150 CFM — or multiple fans zoned to specific areas.
Additional CFM Considerations
- Duct length and turns: Long duct runs and 90-degree elbows create friction that reduces effective airflow. Add 1 CFM per foot of duct run beyond 5 feet, and add 15 CFM per elbow. Many professionals recommend simply oversizing by 20% to compensate.
- Ceiling height: The standard formula assumes 8-foot ceilings. For 9- or 10-foot ceilings, multiply your CFM result by the actual ceiling height divided by 8. A 80-square-foot bathroom with 10-foot ceilings needs 100 CFM (80 × 10/8 = 100).
CFM Quick-Reference Chart
| Bathroom Size (sq ft) | Standard Ceiling (8 ft) | Tall Ceiling (10 ft) |
| 50 | 50 CFM | 63 CFM |
| 75 | 75 CFM | 94 CFM |
| 100 | 100 CFM | 125 CFM |
| 120+ | Calculate by fixture | Calculate by fixture |
Pro tip: Always round up. A fan with slightly more CFM than you need will outperform an undersized unit in every situation.
Step 2: Pay Attention to Sones (Noise Level)
A fan that sounds like a jet engine won’t get used. Noise level, measured in sones, directly impacts whether your household actually turns the fan on — and leaves it running long enough to do its job.
What Are Sones?
A sone is a unit of perceived loudness. Unlike decibels, which measure sound pressure logarithmically, sones scale linearly: 2 sones sounds twice as loud as 1 sone.
Sones Rating Guide
| Sones Rating | Sound Comparison | Recommended For |
| 0.3 – 0.5 | Near-silent; gentle rustling | Master bathrooms, nighttime use |
| 0.5 – 1.0 | Quiet; soft background hum | Any bathroom (sweet spot) |
| 1.0 – 2.0 | Noticeable; comparable to a refrigerator | Guest or secondary bathrooms |
| 2.0 – 4.0 | Clearly audible; normal conversation level | Utility or commercial spaces |
| 4.0+ | Loud; older-model territory | Avoid for residential use |
When figuring out how to pick a bathroom fan, think of sones as a make-or-break factor. The quietest fans on the market today operate below 0.3 sones — virtually silent. This is especially important if the fan will run on a humidity sensor or timer while you sleep.
A good exhaust fan balances sufficient CFM with a sone rating of 1.0 or lower. Many premium models achieve 110 CFM at just 0.3 sones, proving that you no longer need to sacrifice power for silence.
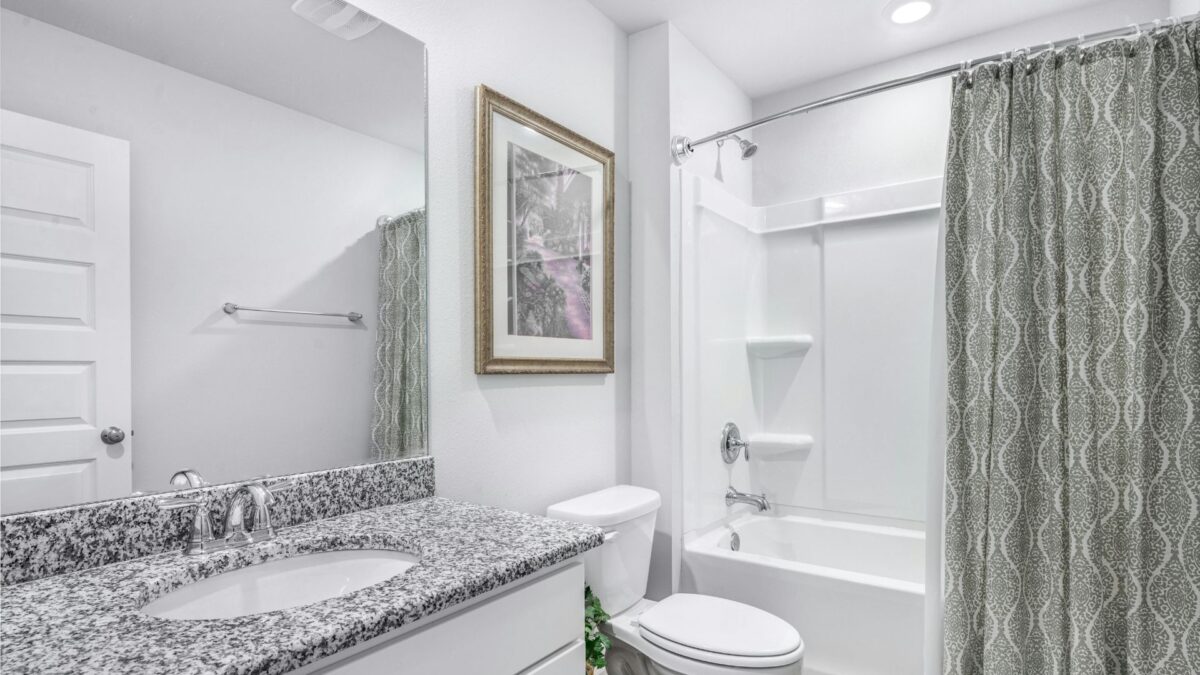
Step 3: Know the Types of Bathroom Exhaust Fans
Not all fans are created equal, and the right type depends on your bathroom’s layout, existing infrastructure, and venting options.
Ducted vs. Ductless Fans
Ducted fans push moist air through ductwork to the outside of your home — through the roof or an exterior wall. This is the gold standard. Ducted ventilation fully removes moisture, odors, and airborne contaminants from the bathroom.
Ductless (recirculating) fans pull air through a charcoal or carbon filter and return it to the room. They do not remove moisture. Ductless fans are a last resort, suitable only when exterior venting is physically impossible (some condominiums or interior rooms with no exterior wall or roof access).
Bottom line: If you can install ductwork, always choose a ducted fan. No filter-based system can replicate true exhaust ventilation.
Ceiling-Mount vs. Wall-Mount Fans
Ceiling-mount fans are the most common. They install between joists in the ceiling and vent air upward through the attic and out a roof cap or soffit vent. They’re ideal for standard bathroom layouts and typically offer the widest selection of CFM ratings and features.
Wall-mount fans install directly through an exterior wall. They’re excellent for bathrooms on the top floor where attic access is limited, or for situations where short, direct duct runs improve efficiency. Wall-mount fans tend to be noisier because the motor is closer to ear level.
Inline Fans
Inline (remote) fans mount in the attic or crawl space, connected to the bathroom via ductwork. The motor sits far from the living space, making inline fans the quietest option available — often below 0.3 sones at the grille. They’re ideal for multi-point systems where one powerful fan serves two or more bathrooms.
Step 4: Prioritize These Essential Features
Modern bathroom exhaust fans offer far more than simple on/off ventilation. The right features transform a basic fan into a set-and-forget home protection system.
Humidity Sensors (Humidistats)
A built-in humidity sensor automatically activates the fan when it detects elevated moisture levels and shuts it off when humidity returns to normal. This is arguably the most valuable feature available. It eliminates human error — no more forgetting to turn the fan on or off — and ensures optimal moisture control 24/7.
Motion Sensors
Motion-activated fans turn on when someone enters the bathroom and run for a preset period after the room is vacated. They’re convenient but less precise than humidity sensors for moisture management, since they run based on occupancy rather than actual moisture levels.
Adjustable Timers and Delay-Off Switches
A countdown timer or delay-off function keeps the fan running for a set period (typically 5 to 60 minutes) after you flip the switch off. The HVI recommends running your exhaust fan for at least 20 minutes after showering to fully clear moisture. A timer automates this process effortlessly.
ENERGY STAR Certification
ENERGY STAR-certified bathroom exhaust fans are independently verified to use up to 70% less energy than standard models. They must also meet strict performance thresholds for airflow and sound. Given that many modern fans run for extended periods (or continuously via humidity sensors), energy efficiency directly affects your utility bill.
Look for the ENERGY STAR label as a baseline quality filter. It guarantees you’re getting a fan that meets or exceeds both efficiency and performance standards set by the EPA.
Built-In LED Lighting
Many ceiling-mount fans integrate LED light panels or nightlights, consolidating two fixtures into one. This simplifies installation, saves ceiling space, and provides functional bathroom illumination. Look for models offering separate switches for the fan and light.
Bluetooth Speakers and Smart Home Integration
Higher-end fans include built-in Bluetooth speakers or Wi-Fi connectivity for smart home integration (Alexa, Google Home). While not essential for ventilation, these features add convenience and can justify the investment during a bathroom renovation.
How to Choose a Replacement Bathroom Exhaust Fan
Replacing an existing fan presents unique challenges. Whether your current unit has failed, become unbearably noisy, or simply lacks the airflow your bathroom needs, here’s a dedicated guide on how to choose a replacement bathroom exhaust fan without unnecessary complications.
Measure Your Existing Fan Housing
Before shopping, remove the grille cover from your current fan and measure the housing dimensions — the metal box recessed into the ceiling. Common housing sizes include:
- 7 ¾” × 7 ¼” (fits most standard retrofit units)
- 8″ × 8″ and 10″ × 10″ (larger housings)
Many manufacturers now design replacement fans with retrofit kits or adjustable mounting brackets that fit standard housing cutouts without modifying the ceiling opening. Broan-NuTone and Panasonic, for example, offer models specifically engineered for drop-in replacement.
Match Your Duct Size
Check the diameter of your existing ductwork — typically 3-inch, 4-inch, or 6-inch round ducts. Your replacement fan’s exhaust port must match. Using a reducer adapter (e.g., connecting a 4-inch fan to a 3-inch duct) is possible but will reduce airflow efficiency and increase noise.
If you’re upgrading to a higher-CFM fan, you may need to upgrade your ductwork diameter. A fan rated above 90 CFM generally requires a 4-inch duct minimum; fans above 150 CFM typically require 6-inch ducts for optimal performance.
Upgrading vs. Like-for-Like Replacement
A straight swap — same housing size, same duct diameter, same CFM — is the simplest path. But replacement time is also the perfect opportunity to upgrade. Consider:
- Increasing CFM if your bathroom has always had lingering moisture problems.
- Dropping the sone rating if your old fan’s noise has discouraged use.
- Adding features like a humidity sensor, timer, or LED light that weren’t available when your original fan was installed.
Many modern replacement fans deliver 110 CFM at 0.7 sones in the same housing footprint that once held a 50 CFM, 4.0-sone unit. The performance leap is dramatic and well worth the modest price increase.
Electrical Compatibility
Verify your existing wiring. A basic fan requires a single switch leg (one set of wires). Adding a fan with a separate light or a humidity sensor may require additional wiring or a multi-function wall switch. If you’re uncomfortable with electrical work, hire a licensed electrician — it’s a small cost relative to the value of a properly functioning ventilation system.
Installation Considerations
Understanding how to choose a bathroom exhaust fan extends beyond the product itself. Installation quality determines whether your fan performs as rated.
Ductwork and Venting Best Practices
- Always vent to the outside. Never vent into an attic, soffit, or crawl space. Dumping warm, moist air into these areas causes condensation, mold, and wood rot.
- Use rigid or semi-rigid metal ductwork. Flexible vinyl ducts sag, collect condensation, and restrict airflow. They also fail to meet code in many jurisdictions.
- Keep duct runs as short and straight as possible. Every foot of length and every elbow reduces effective CFM.
- Insulate ducts in unconditioned spaces (attics, crawl spaces) to prevent condensation inside the duct.
- Install a damper or backdraft flap at the exterior termination point to prevent outside air, pests, and weather from entering.
DIY vs. Professional Installation
Replacing an existing fan with a same-size unit is a manageable DIY project for someone comfortable working with basic electrical connections and attic access. However, hire a professional if:
- You need new ductwork routed through the attic or wall.
- The project requires a new electrical circuit or upgraded wiring.
- Your local building code requires a permit and inspection.
- You’re installing an inline fan system serving multiple rooms.
Common Mistakes to Avoid
Even with the right information, these frequent missteps undermine bathroom ventilation:
- Choosing CFM based on fan price, not bathroom size. Undersized fans cannot adequately ventilate the space regardless of how long they run.
- Ignoring sones. A loud fan doesn’t get used. A quiet fan runs reliably and protects your home.
- Venting into the attic. This is the single most destructive installation error and violates virtually every building code.
- Using flexible vinyl duct. It restricts airflow, traps moisture, and degrades quickly.
- Skipping the timer or humidity sensor. Manual operation relies on human memory, which is unreliable. Automation is always better.
- Not running the fan long enough. Twenty minutes after showering is the minimum. A delay timer or humidistat handles this automatically.
Final Checklist: How to Pick a Bathroom Fan with Confidence
Use this quick-reference checklist before making your final purchase:
- CFM calculated correctly for your bathroom’s square footage, ceiling height, and duct run length.
- Sones rated at 1.0 or lower for comfortable, consistent use.
- Ducted ventilation to the building exterior (not attic or soffit).
- Duct diameter matched to the fan’s exhaust port.
- ENERGY STAR certified for efficiency and verified performance.
- Humidity sensor or timer included for automated moisture control.
- Housing dimensions confirmed (critical for replacement scenarios).
- Electrical compatibility verified with existing wiring.
Frequently Asked Questions
What size exhaust fan do I need for a small bathroom?
For bathrooms under 100 square feet, use 1 CFM per square foot as your baseline. A 50-square-foot half bath needs at least 50 CFM. The HVI recommends a minimum of 50 CFM for any bathroom regardless of size.
Can I install a bathroom exhaust fan myself?
A direct replacement using the same housing size and duct diameter is a reasonable DIY project. New installations requiring ductwork, roof penetrations, or electrical wiring should involve a licensed contractor.
How long should a bathroom exhaust fan run after a shower?
At least 20 minutes. A delay-off timer or humidity sensor automates this and ensures thorough moisture removal every time.
Is a ductless bathroom fan effective?
Ductless fans filter odors but do not remove moisture. They should only be used when exterior venting is truly impossible. For moisture control, a ducted fan is the only effective solution.
How often should a bathroom exhaust fan be replaced?
Most quality fans last 10 to 15 years with proper maintenance. If your fan has become noticeably louder, vibrates, or no longer clears steam effectively, it’s time for a replacement.
What makes a good exhaust fan?
A good exhaust fan delivers adequate CFM for the room size, operates quietly (below 1.0 sone), carries ENERGY STAR certification, and includes automated controls like a humidity sensor or timer. It should be properly ducted to the exterior and sized to match existing or new ductwork.
Conclusion
Learning how to choose a bathroom exhaust fan is ultimately about matching three things: airflow capacity to your room’s size, noise level to your tolerance, and features to your lifestyle. Get the CFM right, insist on quiet operation, choose a ducted system vented to the outside, and invest in automation through humidity sensors or timers. Whether you’re installing a fan for the first time or figuring out how to choose a replacement bathroom exhaust fan, the principles are the same — and the payoff is a bathroom that stays dry, healthy, and damage-free for decades.